How to build your own customizable, upgradeable laptop

Updated: August 1, 2025
Since the earliest days of home computing, desktop PCs have been systems you could build on your own and upgrade when needed. Even the first Apple computer came as a motherboard kit without a case. Notebooks though have followed a different path, becoming locked-down, one-size-fits-all items with limited or no opportunity for upgradeability. With the Framework Laptop, we’ve turned that around, with a thin, light, high-performance notebook that you can customize and build yourself and upgrade whenever you’d like, all using the single screwdriver that comes in the box. In this post, we’ll walk through what is customizable, how to choose the right parts, and how to build your own laptop.
Choosing your Framework Laptop
The first step is to choose between the Framework Laptop 12, Framework Laptop 13 and Framework Laptop 16. Framework Laptop 12 is an entry-level flexible 12.2” convertible with 360-degree hinge and touchscreen display with stylus support. Framework Laptop 13 is a step up in performance: an ultra-portable 13.5” notebook that is great for productivity use cases like software development, school work and office tasks. Framework Laptop 16 is an extremely powerful 16” notebook with optional high-performance discrete graphics, making it excellent for gaming, creativity, and workstation use cases too. All are easy to set up, upgrade, and repair, and are made from lightweight, durable materials (TPU overmolded on PC/ABS for Framework Laptop 12, aluminum for Framework Laptop 13, and aluminum and magnesium for Framework Laptop 16). You can pick between them based on whether you prioritize portability, your use case demands a high-power GPU, or if you just have a general screen size preference.
The next decision is whether to pick up a pre-built Framework Laptop or a Framework Laptop DIY Edition. Pre-builts come ready to go out of the box with Windows preinstalled like any other notebook. The DIY Edition is what we’ll deep dive on here. It allows for much deeper customization and enables you to assemble it yourself on day one. That may sound daunting, but we’ve designed the experience to be really straightforward, even if you’ve never been inside a computer before. Configuring and ordering a Framework Laptop is simple. We have a step-by-step configurator that you can follow. Below, we’ll go into more detail on how to choose the right parts at every step.
Selecting your processor and graphics
Framework Laptop 12 comes in i3 and i5 Intel Core 13th Gen processor options. These are entry-level processors for basic productivity, and the i5 offers greater CPU and GPU performance for slightly heavier workloads. The system also has support for up to 48GB of DDR5 and 2TB of storage, Wi-Fi 6E, an excellent full-size keyboard, a 50Wh battery, a bright 1920x1200 touchscreen, a 1080p webcam, and USB 3.2, DisplayPort, and power input on all four Expansion Card slots. This is our first-ever touchscreen laptop, and we went all out with both a 360-degree hinge and stylus support. We designed our own color-matched Stylus with tilt and pressure support and you can also use any USI 2.0 or MPP 2.0-compatible stylus. The touchscreen and stylus work great across both Linux and Windows.
Framework Laptop 13 comes in both Intel and AMD configurations. Intel Core Ultra Series 1 offers an excellent peripheral set with four Thunderbolt 4 ports. AMD Ryzen AI 300 Series offers greater graphics performance on its integrated GPU. Both have fantastic CPU performance, whether your workload is single threaded or multithreaded. For each processor brand, we also have multiple performance options, with Core 5 and 7 options on Intel and Ryzen 5, 7, and 9 options on AMD. You can choose based on both your performance needs and your budget. For general productivity uses, a base configuration is usually sufficient, while you may want to move to a higher performance option if you’re doing programming, heavy multitasking, media editing, or gaming. Keep in mind that with a Framework Laptop, the Mainboard (the laptop’s motherboard module) is upgradeable too, meaning you can move to a newer, faster processor in the future if you need to.
Framework Laptop 16 comes with AMD CPUs, with Ryzen 7040 Series Ryzen 7 7840HS and Ryzen 9 7940HS options. In addition, Framework Laptop 16 has the Expansion Bay System that allows for upgradeable graphics. You can choose to either leverage the integrated graphics on the processor with the Expansion Bay Shell, or pick up a Radeon RX 7700S Graphics Module if you plan to run recent games or creative applications.
Configuring your memory and storage
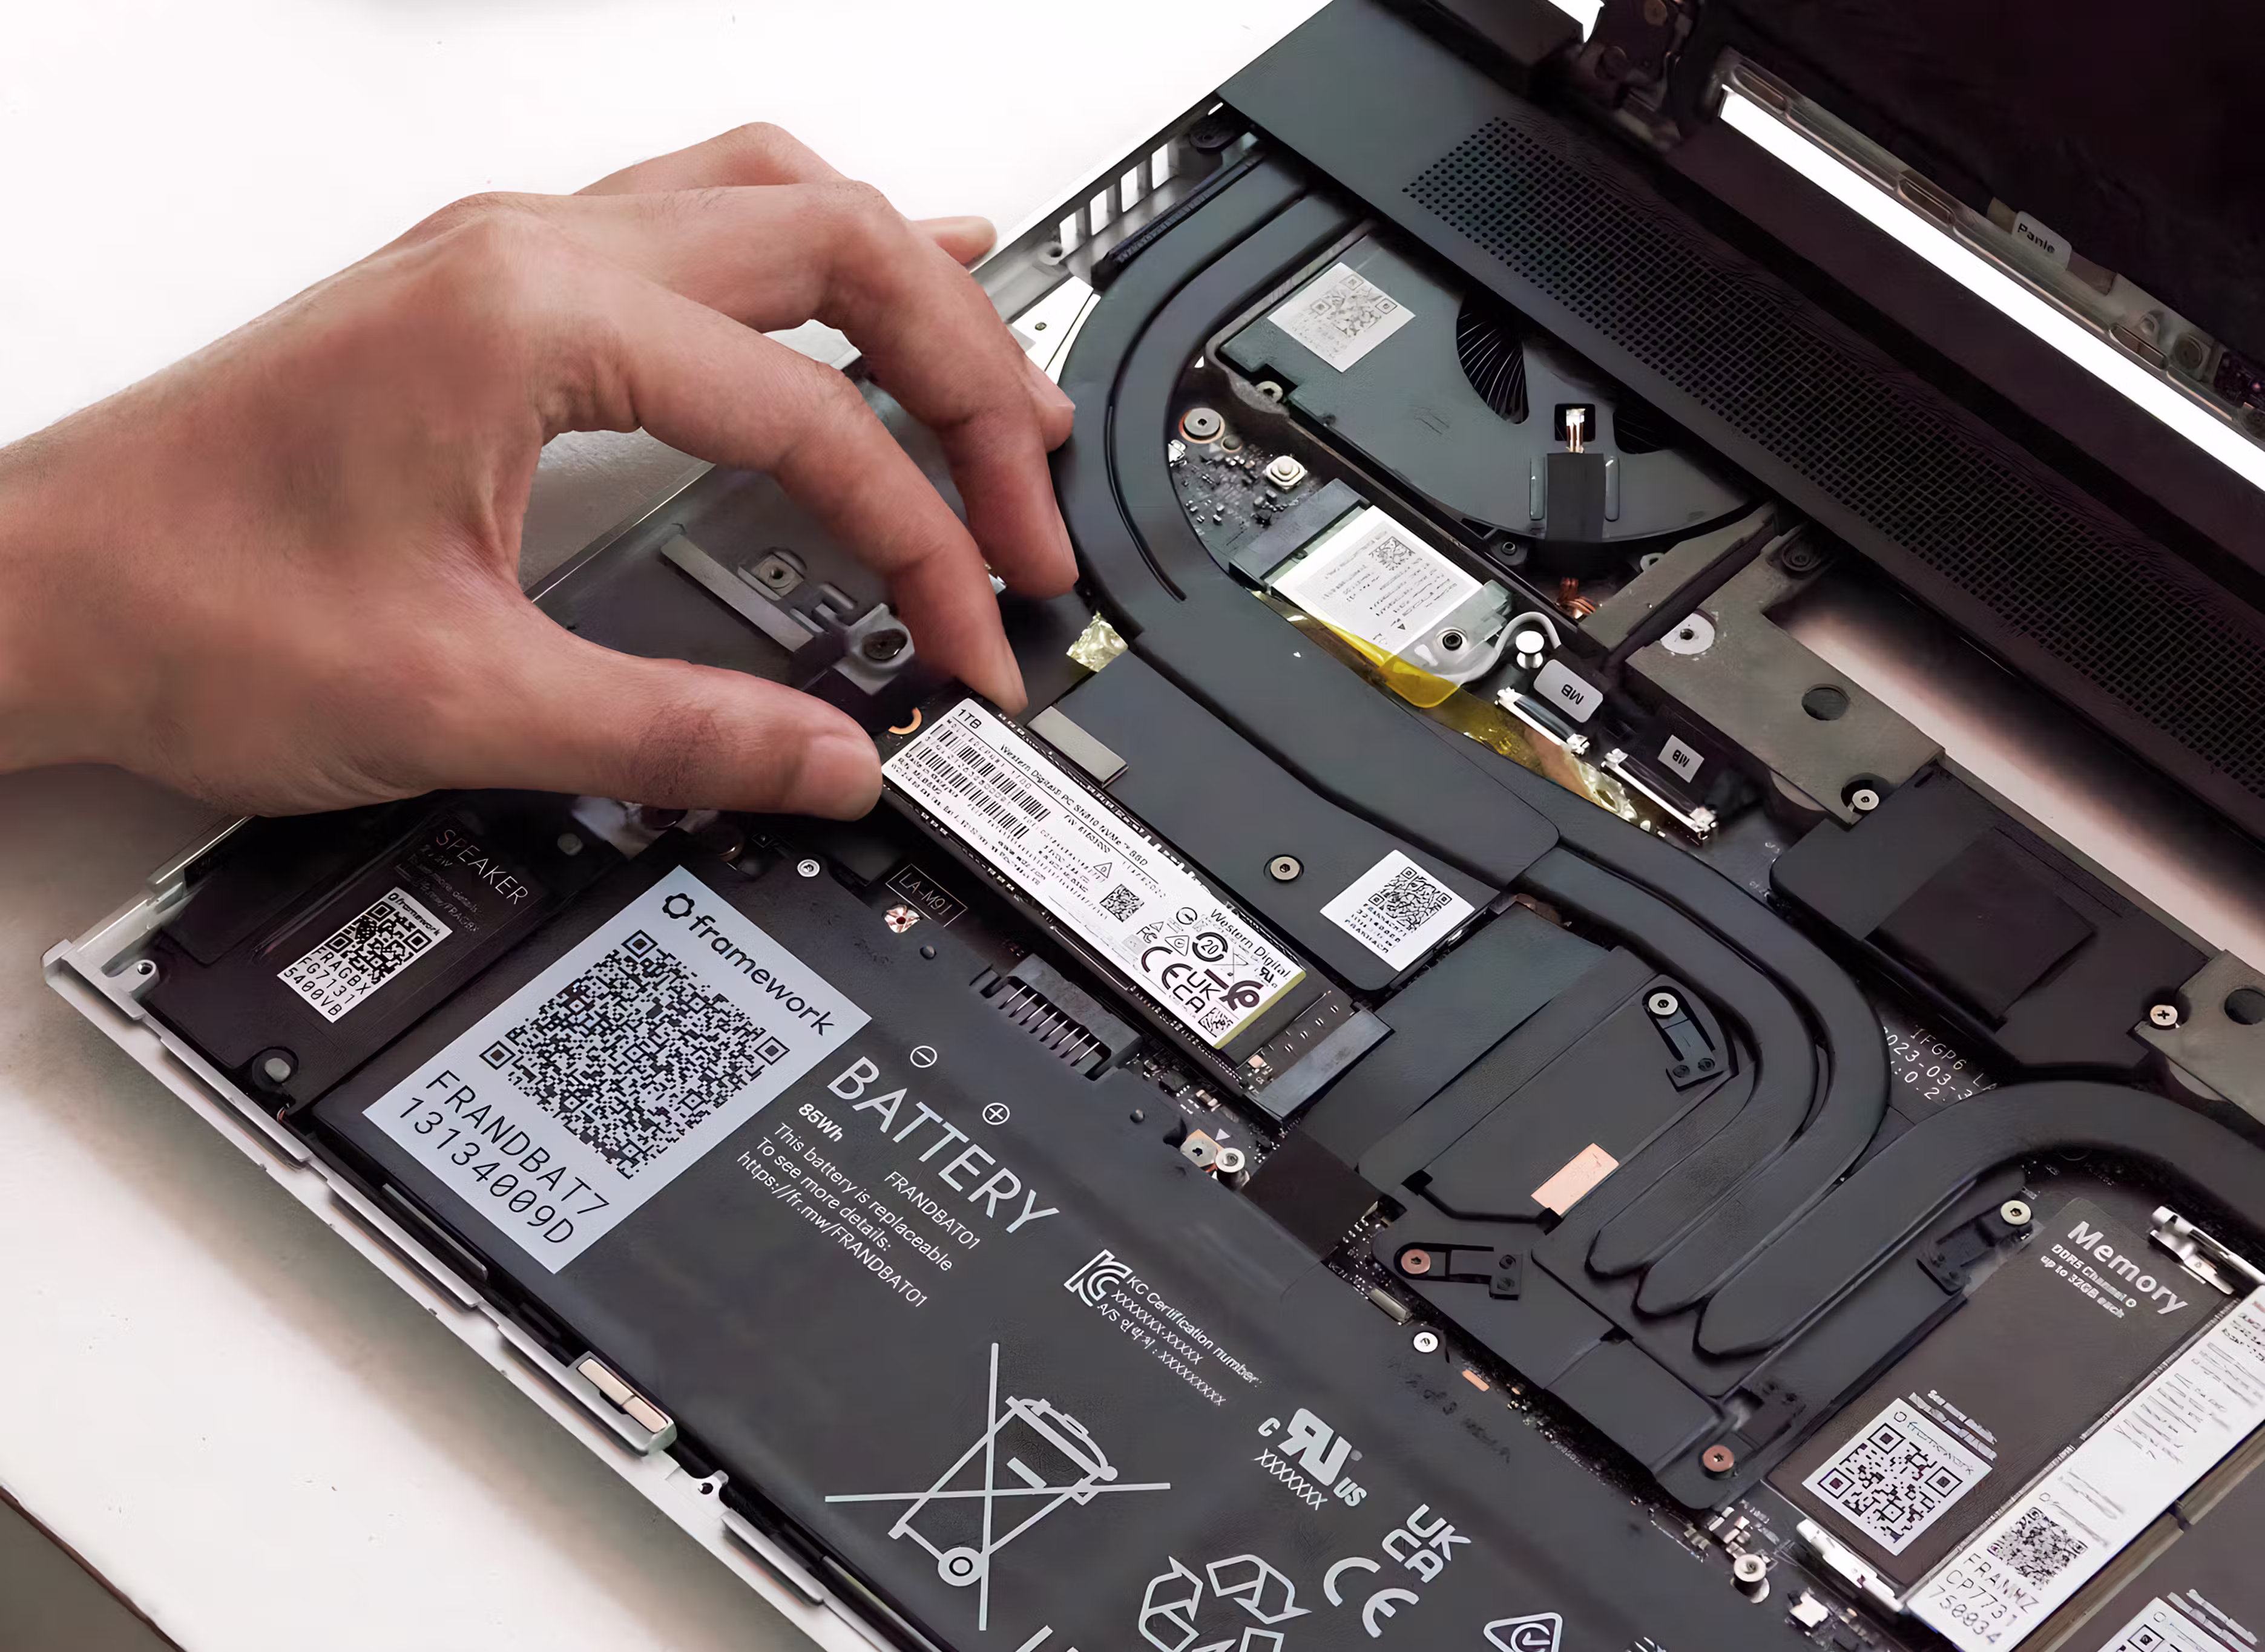
Next, you can choose your memory and storage. Since Framework Laptops are modular (more on this in the deep-dive blog posts for the Framework Laptop 13 and Framework Laptop 16), you can choose to bring your own compatible modules or pick the ones that we offer. You can also upgrade to greater capacity in the future if you ever need to. On Framework Laptop 12, there’s one SO-DIMM slot that supports up to 48GB DDR5 (running at DDR5-5200 speeds). On Framework Laptop 13 and 16, there are two DDR5 SO-DIMM slots, for a total of up to 96GB.
Heavier workloads like compiling, simulation, or just loading a colossal number of browser tabs benefit from more memory. Using two sticks instead of one also improves memory bandwidth, which especially helps for gaming use cases.
For storage, Framework Laptop 12 has a single M.2 2230-sized slot that you can place an SSD into, and Framework Laptop 13 has a single M.2 2280-sized slot. Framework Laptop 16 has both a primary M.2 2280 slot and a secondary M.2 2230 slot for additional storage. We offer Western Digital storage drives from 250GB up to 8TB, but you can also bring your own NVMe-based SSDs if you prefer. You can choose the storage capacity you need based on your typical uses. While 250GB to 500GB is enough for basic productivity and browsing uses, photo and video editing, professional applications, and games can drive up your needs into one or more terabytes.
Picking an Operating System
Framework Laptop DIY Editions ship without an OS installed. You can pick up Windows 11 Home or Pro while configuring your laptop, or you can choose to bring your own operating system. That could be your own license of Windows or your preferred Linux distribution. We have guides available for Ubuntu, Fedora, and other popular distros.
Customizing colors and input
Here is where the customization options on the Framework Laptop really start to be visible. Framework Laptop 12 comes in five bold colorways, each with an optional color-matched stylus.
For Framework Laptop 13 and Framework Laptop 16, you can color customize them using magnetically-attached bezels. We have a range of colors that you can choose from when configuring your DIY Edition. For both DIY and pre-built options, you can also choose from a wide range of colorful USB-C Expansion Cards. The translucent options have been particularly popular.
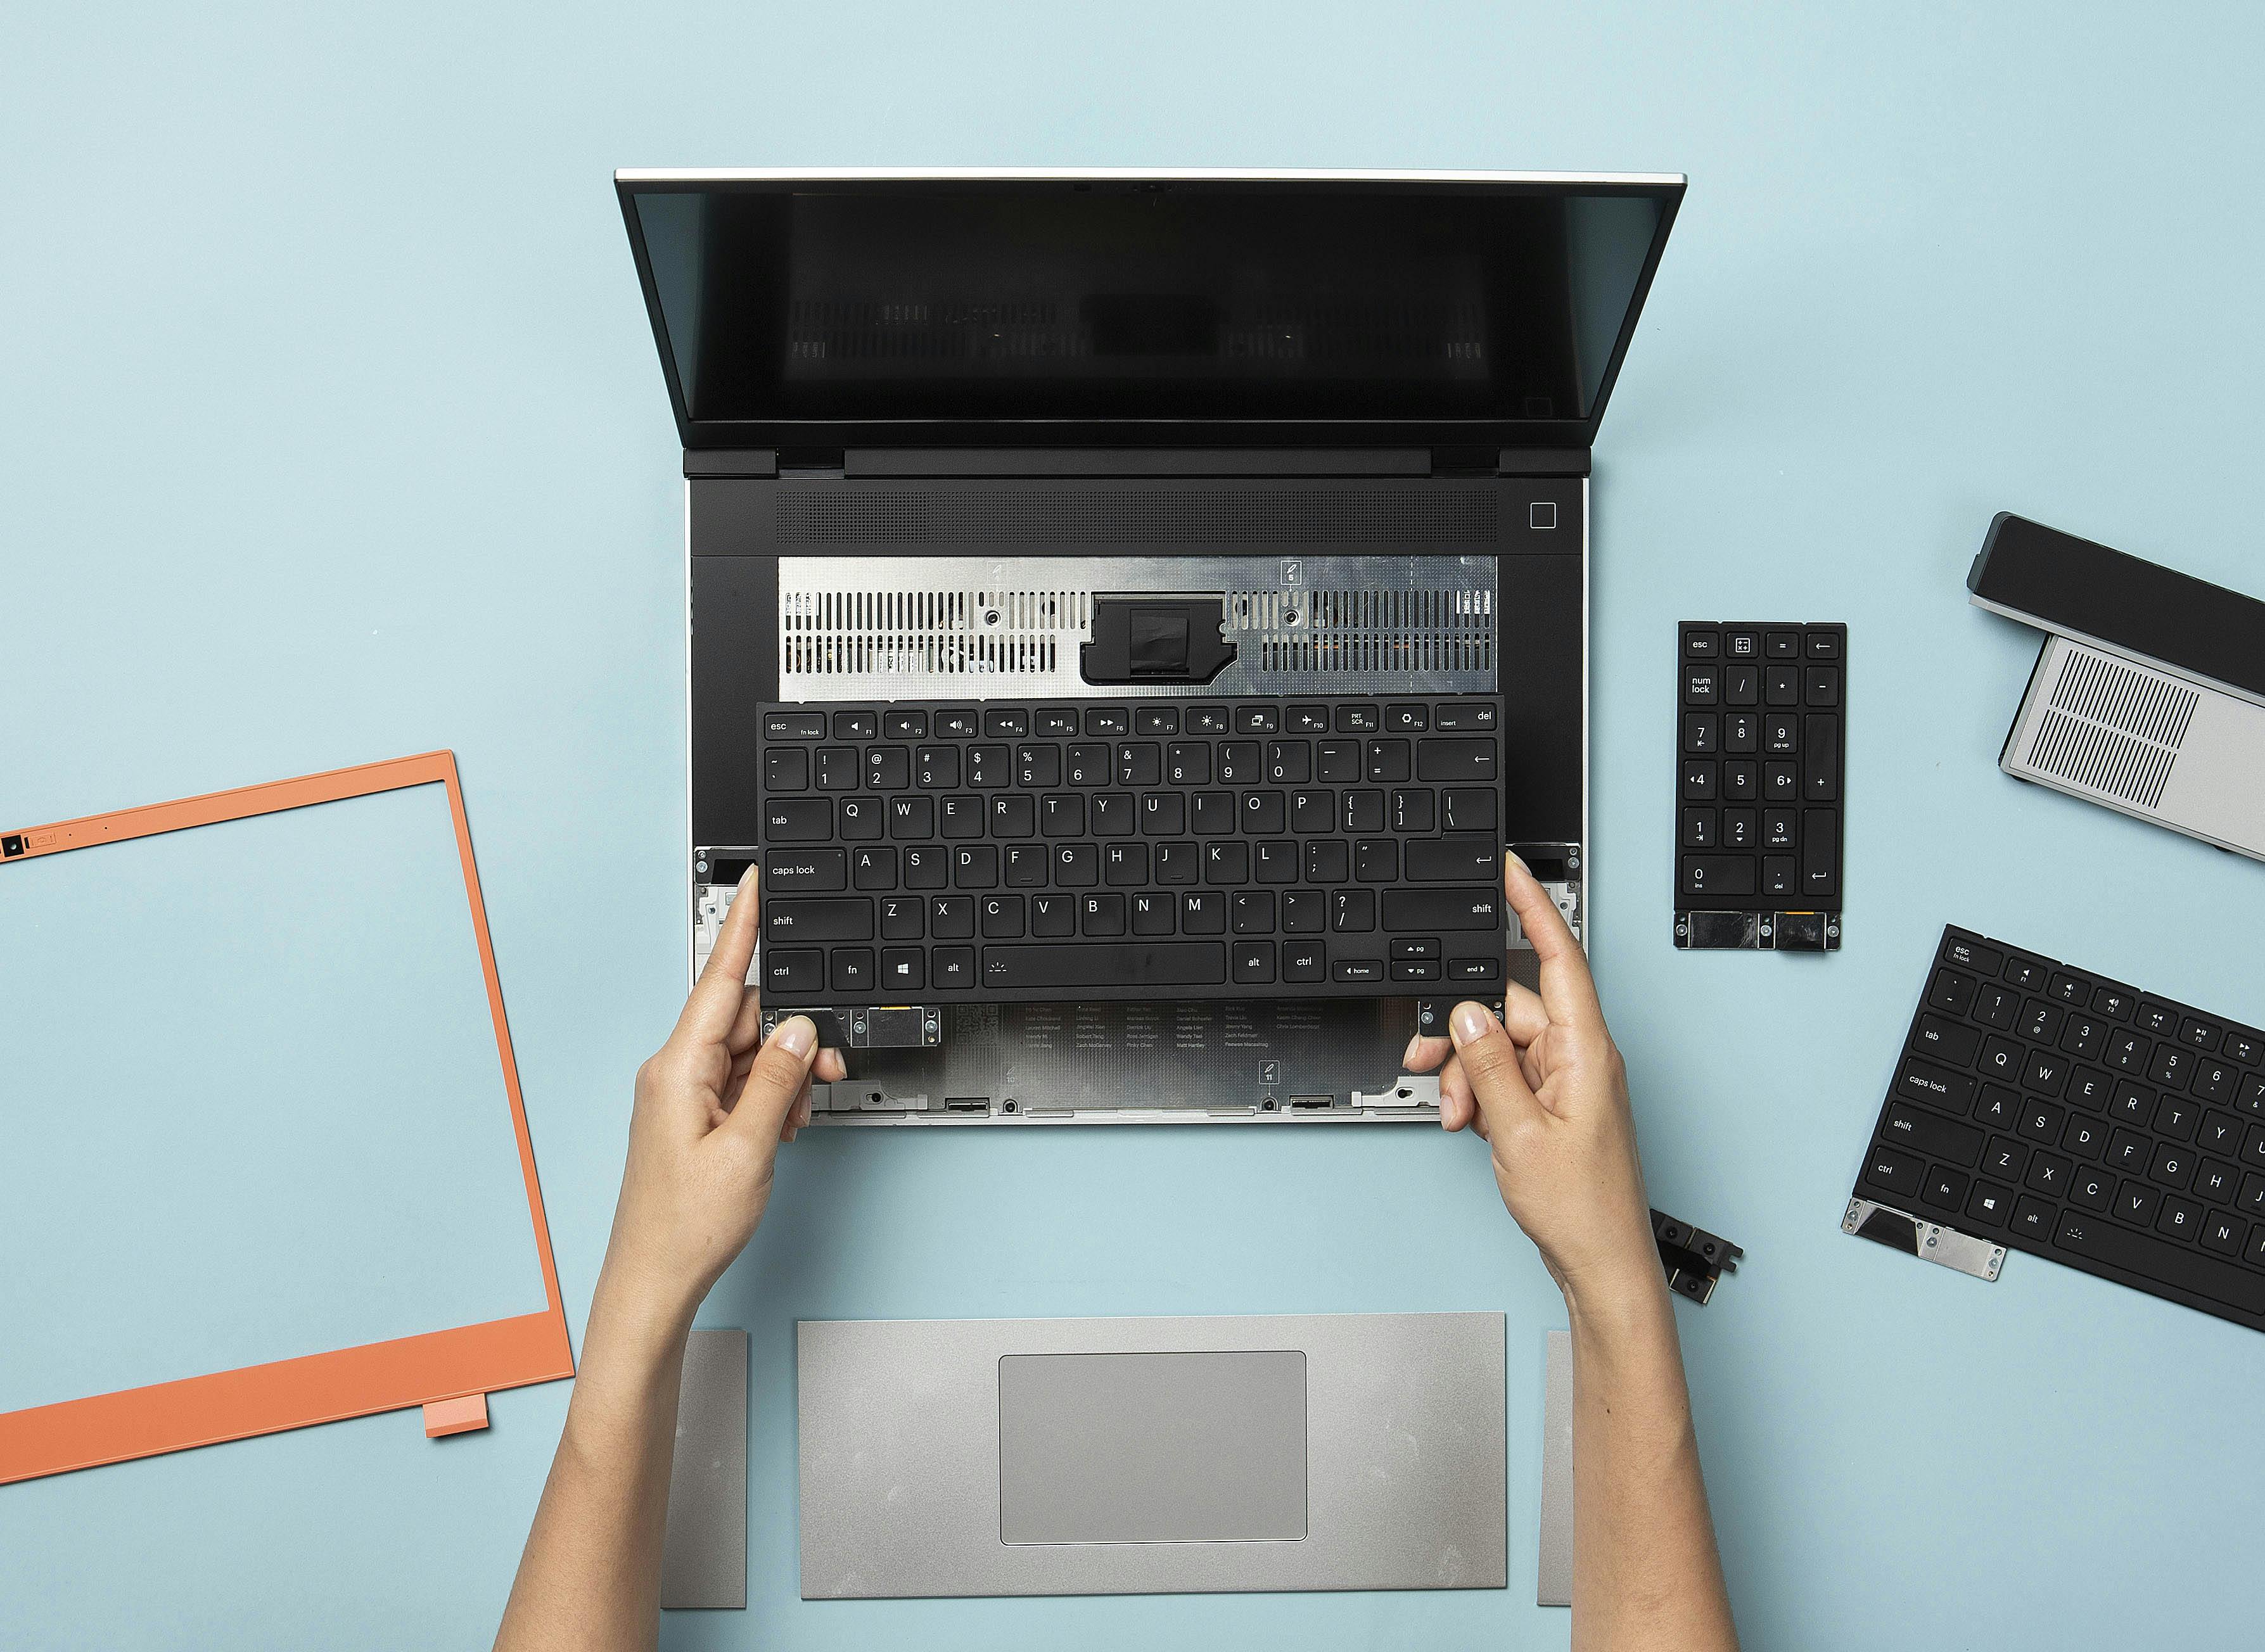
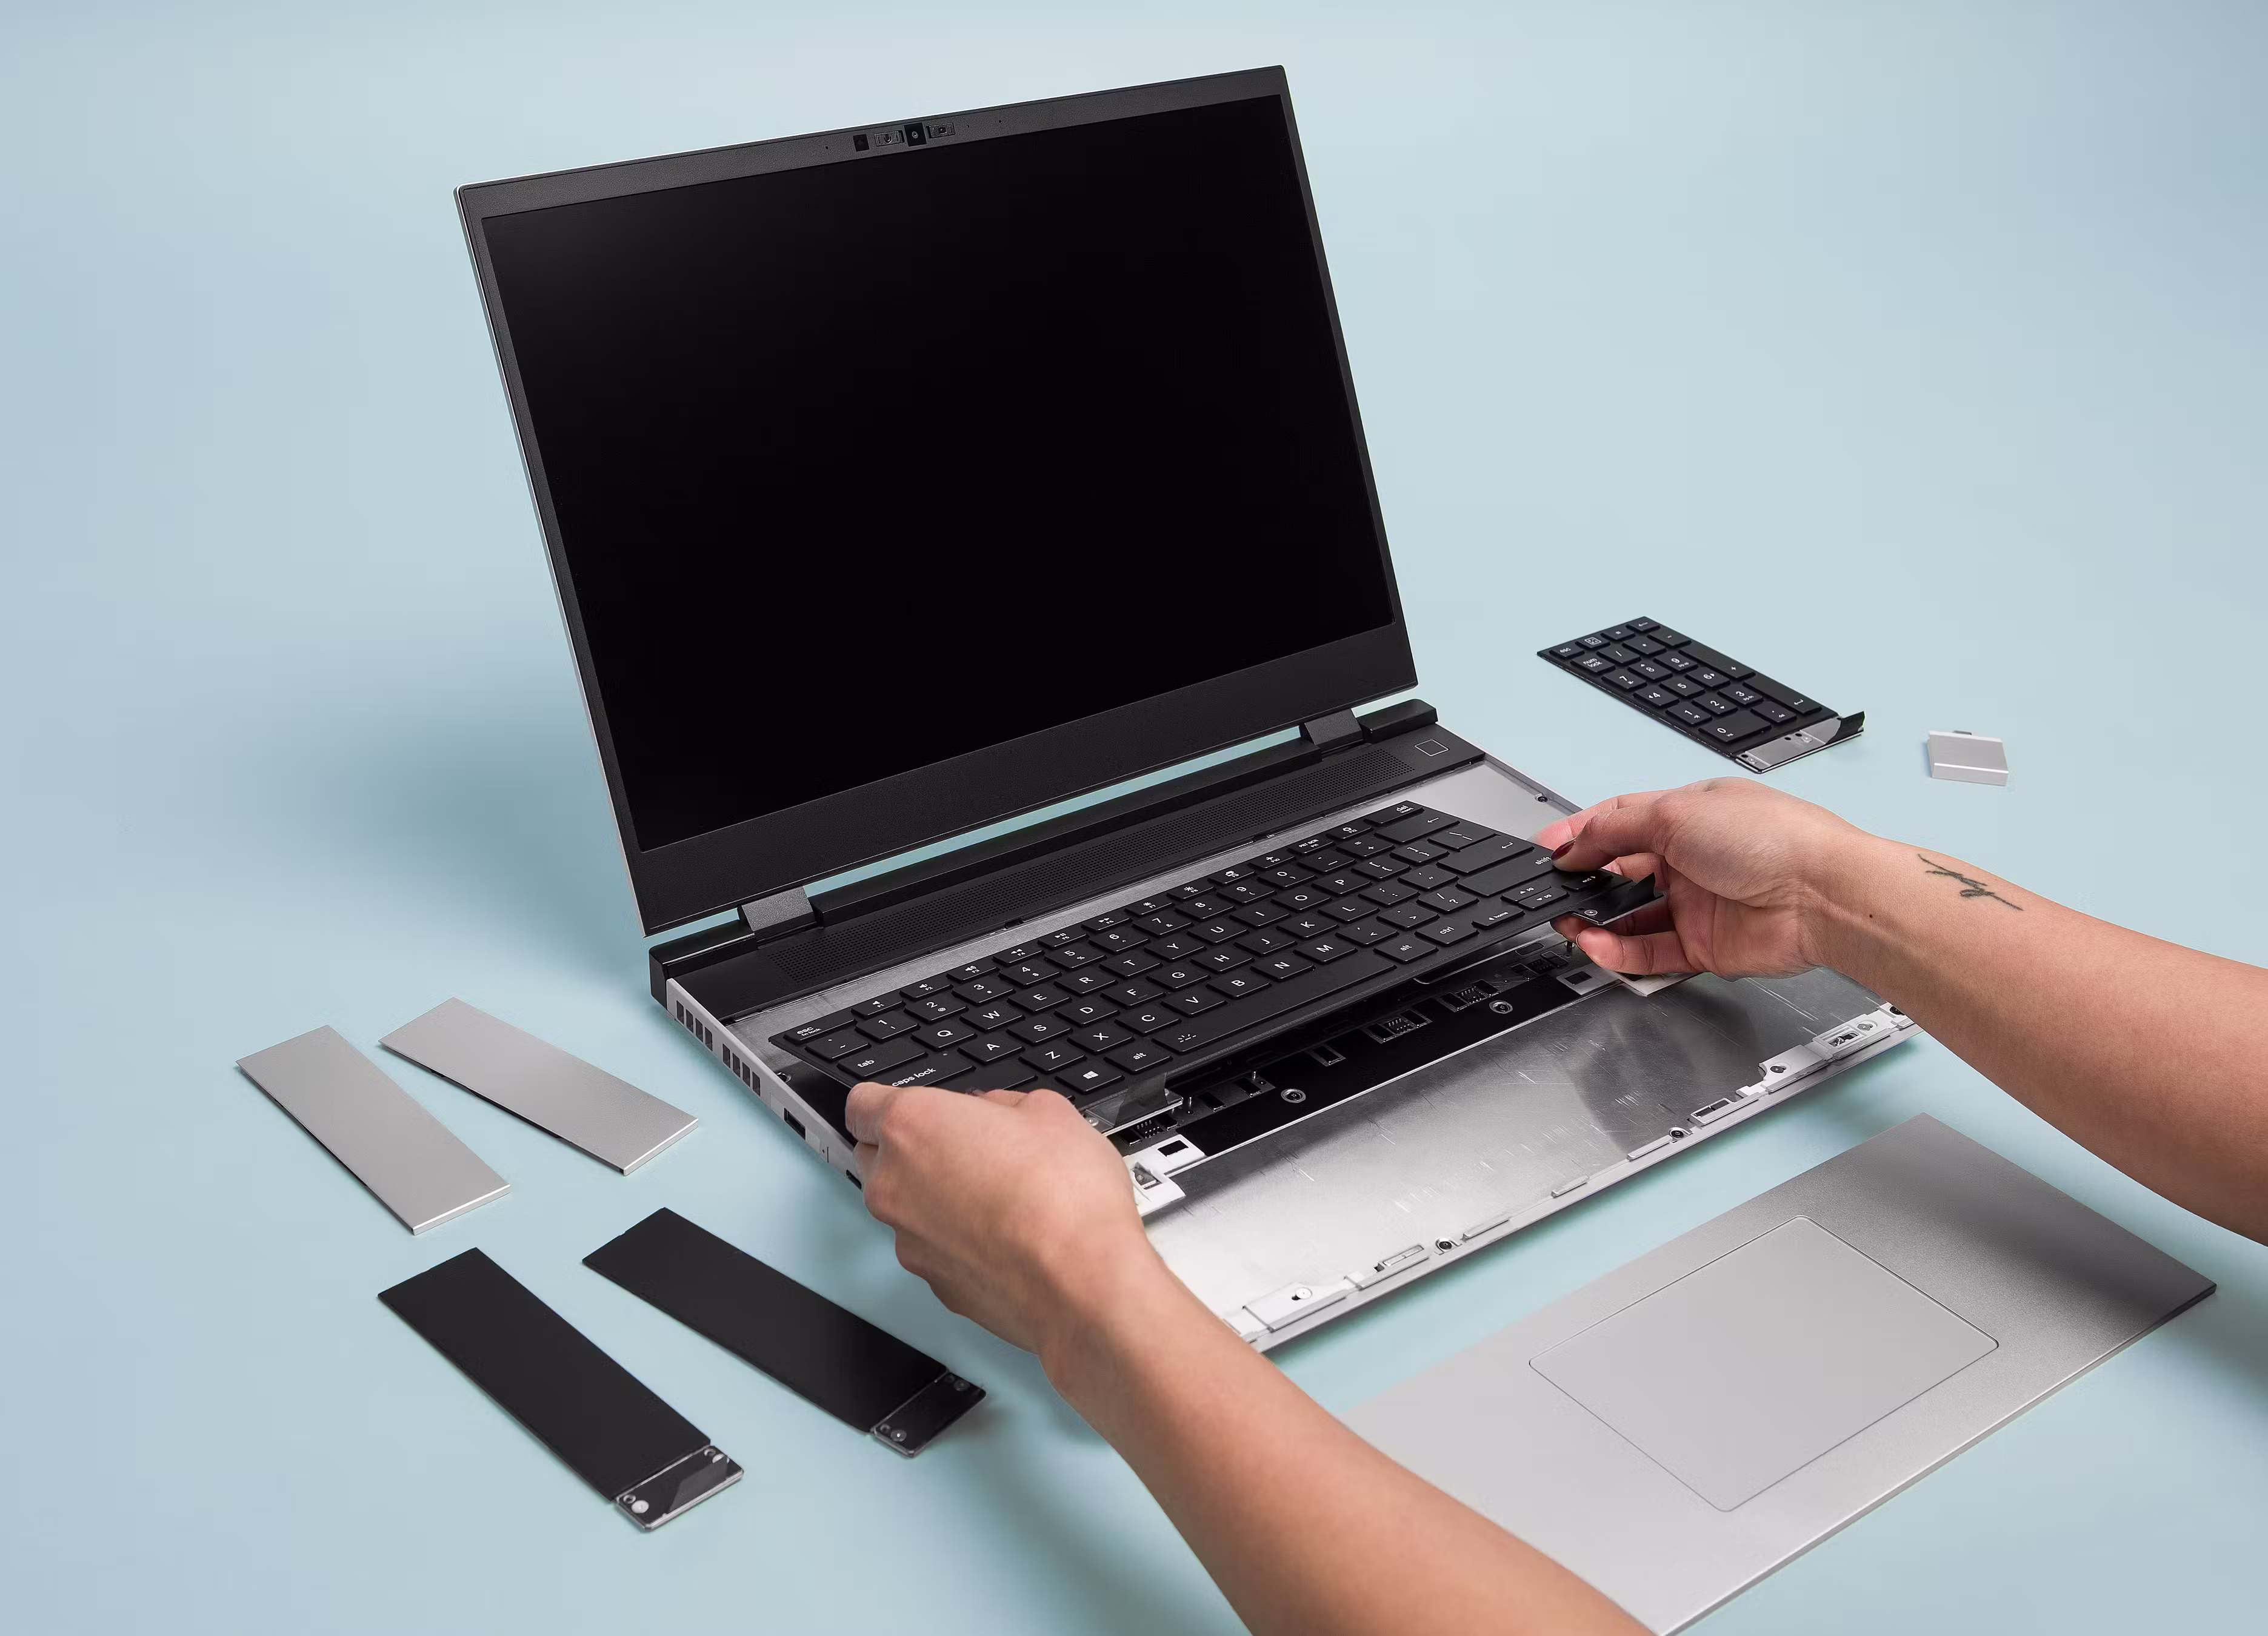
The input system is also customizable. On Framework Laptop 12 and Framework Laptop 13, you can select Input Covers with a range of keyboard languages and even clear or blank options. With Framework Laptop 16, the customization is even deeper. The input deck is a fully reconfigurable set of Input Modules, letting you choose keyboard languages, RGB keyboards, the choice of a numpad or macropad, a range of color-customizable spacer options, and a programmable LED Matrix. All of these are up to your own personal preference, and you can always pick up additional modules later in the Framework Marketplace.
Picking a power adapter
Unlike most laptops, you can choose whether you’d like to order a Framework Laptop with a power adapter or not. We offer 60W USB-C power adapters for Framework Laptop 12 and Framework Laptop 13, and 180W USB-C power adapters for Framework Laptop 16. If you already have a high-wattage USB-C power adapter, you can choose to use that instead. We recommend using one with the same or higher wattage than the ones we offer.
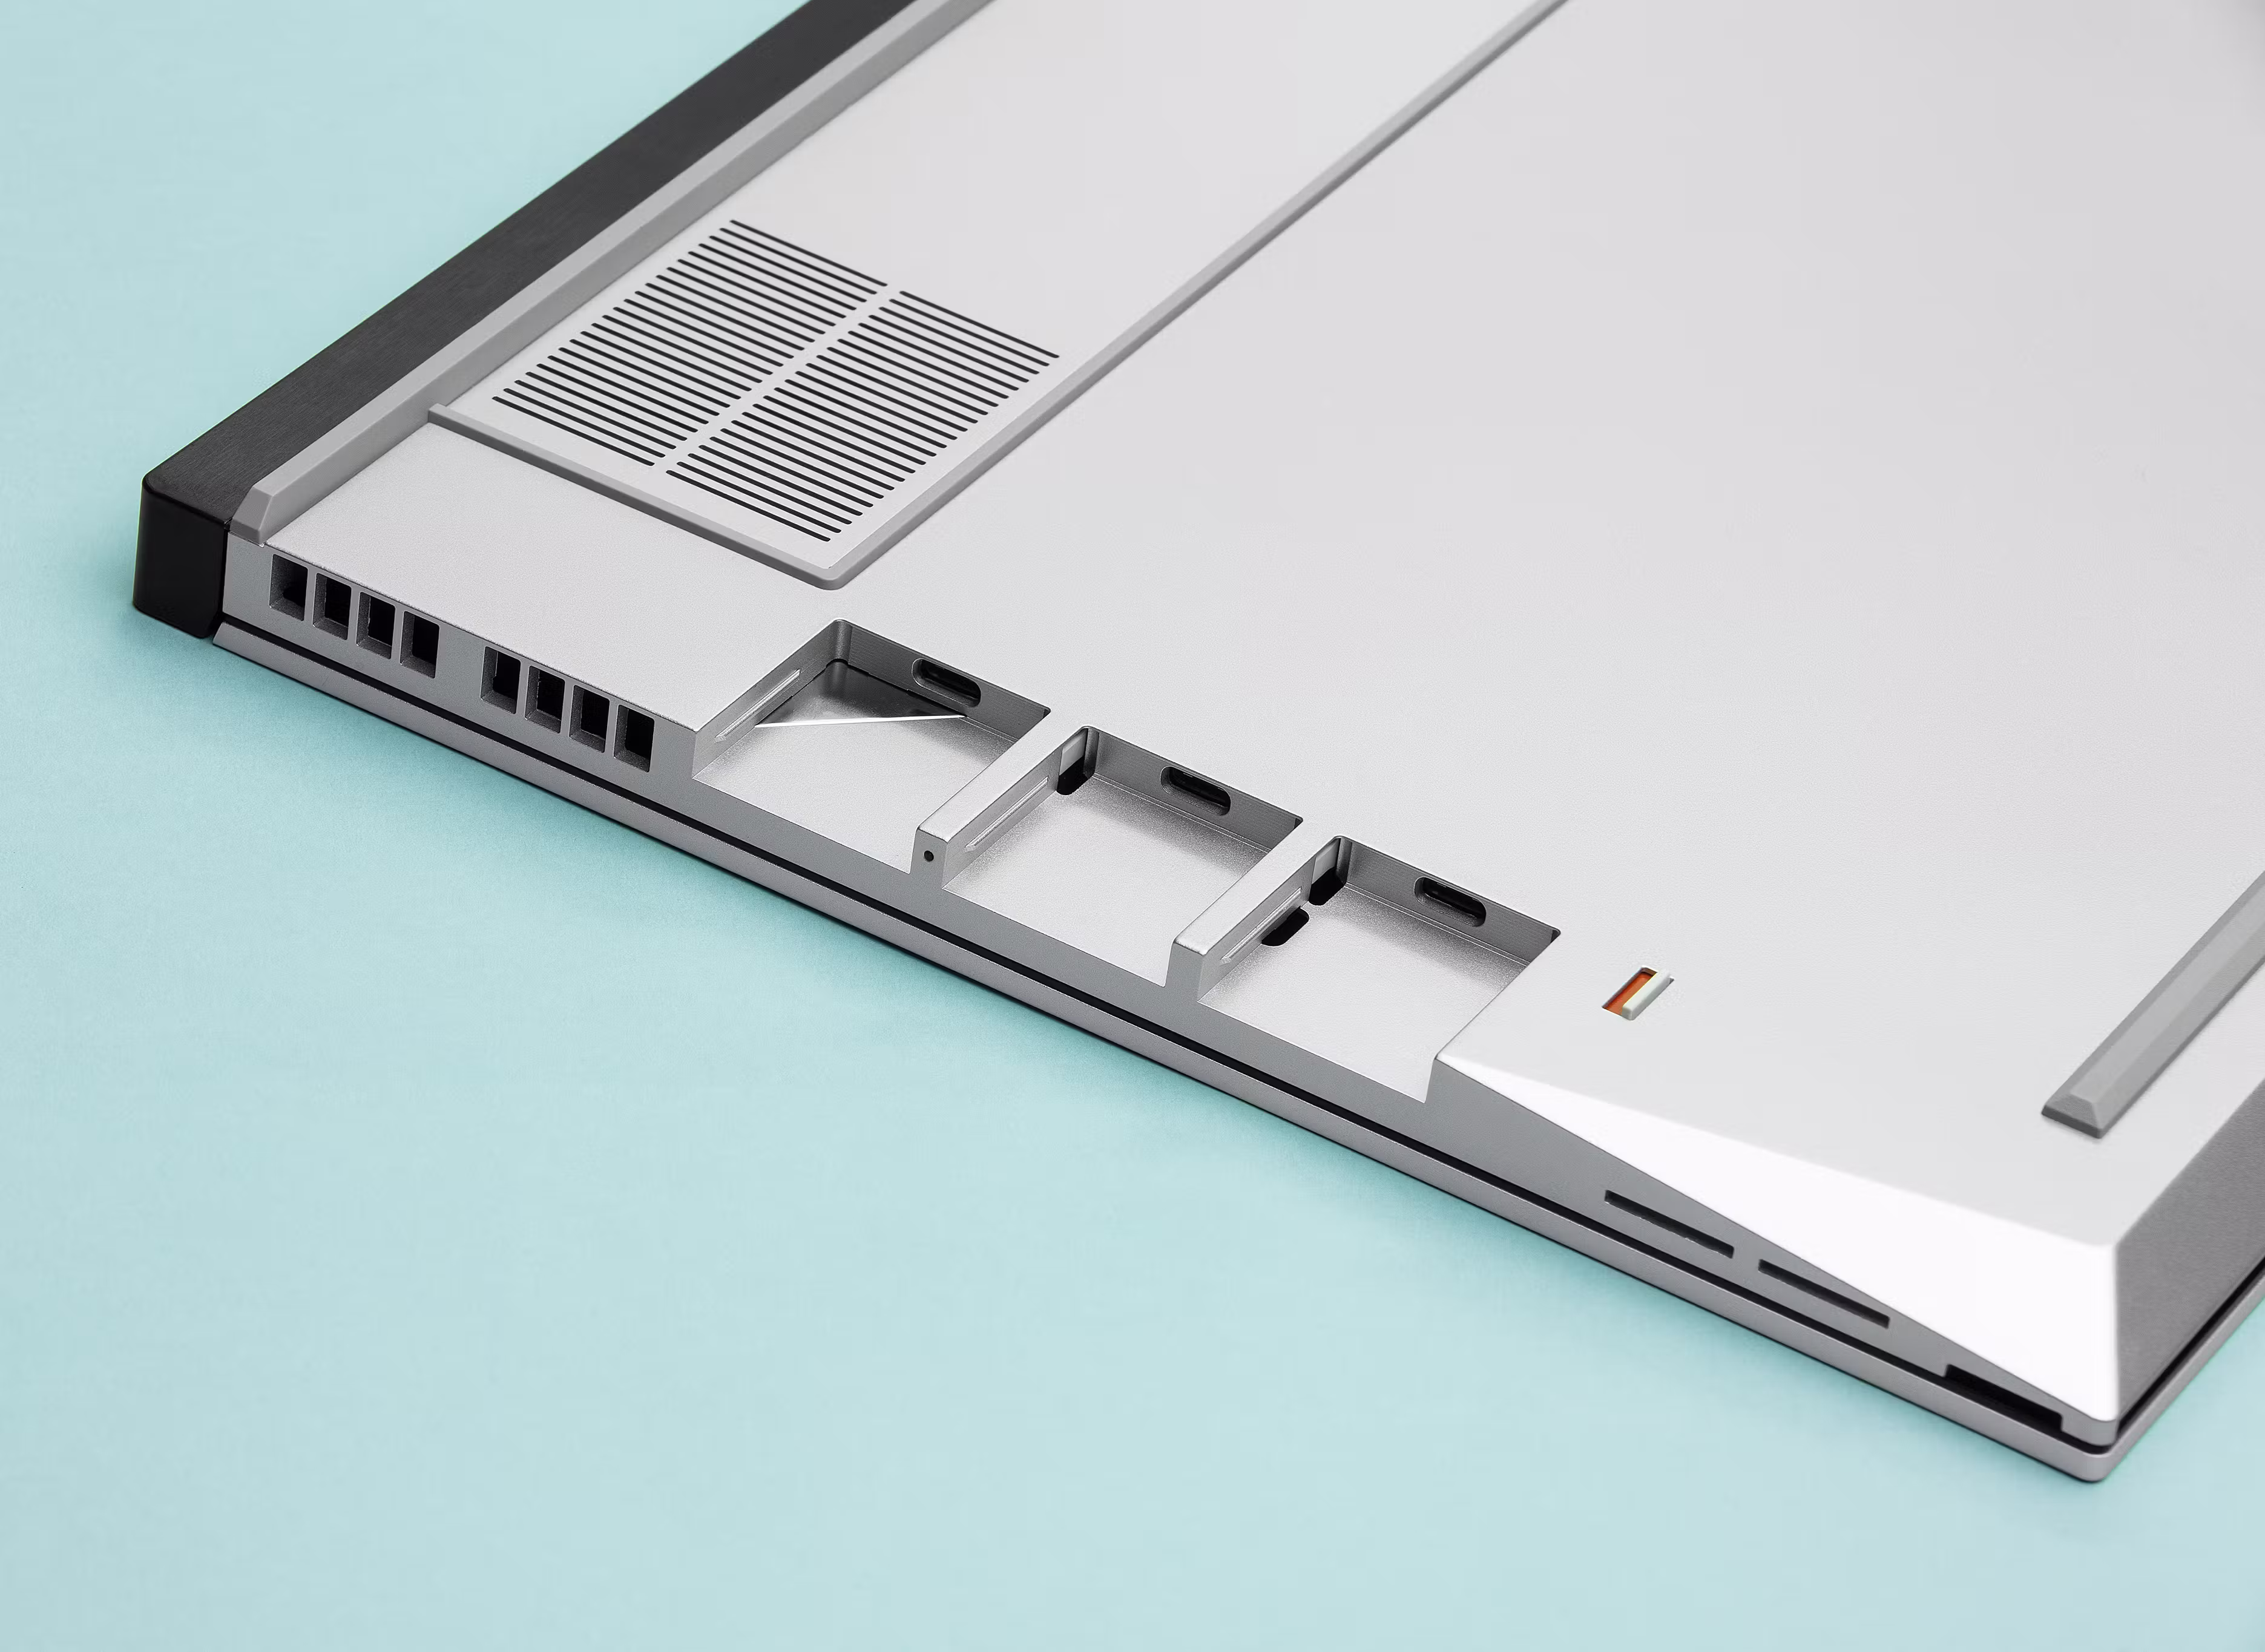
Choosing Expansion Cards
Another unique feature of Framework Laptops is that all of the ports are customizable using Expansion Cards. You can choose the ports you want and which side of the system you’d like them on. We have USB-C, USB-A, HDMI, DisplayPort, SD, MicroSD, Ethernet, Audio, 1TB, and 250GB Expansion Cards available, with more coming over time. The most popular configuration for Framework Laptop 13 is 2x USB-C, 1x USB-A, and 1x HDMI, but you can choose based on the peripherals and monitors you’ll be plugging in. You can also pick up Expansion Cards as needed in the future in the Framework Marketplace.
Building your own laptop
Once you receive your Framework Laptop, building it is easier than you might expect! We have simple step-by-step guides with images and short videos explaining everything you need to do. The only tool you’ll need is the Framework Screwdriver we include in the box. It takes just 10-20 minutes to put together and power on, followed by another 10-20 minutes to install your preferred operating system.
- Framework Laptop 12 Resources and Guides
- Framework Laptop 13 Resources and Guides
- Framework Laptop 16 Resources and Guides
Upgrading your laptop
One of the key advantages of a customizable laptop that you can build yourself is that you can upgrade it yourself too! Every one of the modules we went through above can be swapped and upgraded to newer versions as we release them. We’ve released several generations of Mainboards already, enabling existing Framework Laptop owners to upgrade to the latest and greatest processors. With Framework Laptop 16, that extends to being able to upgrade graphics too!
All of this means you have the freedom and flexibility to update and improve your computer as needed and reduce e-waste too by having a machine that lasts longer.
Frequently asked questions
Is it cheaper to build my own laptop?
It’s often cheaper to build your own laptop than to buy a pre-assembled one. This is especially true if you have compatible memory or storage already or can find a great deal on some. Another factor is the operating system license. If you’re using a free Linux distribution or you already have a retail Windows license that you can use, that can turn into a meaningful cost savings.
Additionally, because the Framework Laptop is easy to upgrade and repair, you can save money over time by upgrading parts as needed instead of buying an entire new computer.
Why should I build my own laptop?
While we can point to a number of reasons like cost savings and deeper customization options, ultimately the most important reason is that it’s fun to build a laptop! You have the opportunity to make it truly your own.
How hard is it to build my own laptop?
It’s easy! A large number of Framework Laptop customers have never opened a computer before building their laptop and found the process to be straightforward and enjoyable. You can check out the step-by-step guides ahead of time to see what’s needed.
What if I need help building my laptop?
If you need help at any point, whether that is researching what to buy, picking parts, putting your system together, or using it, you can reach out to Framework Support for help. The Framework Community is also an amazing resource to connect with other Framework Laptop users who are happy to share ideas and feedback.